This page contains information on wireless webcams available in the UK, plus mini-reviews of two common cameras.
What is a wireless webcam?
If you have a wireless (Wi-fi) network in your home or at your office, you might want to consider getting a wireless webcam, so that you can keep an eye on things while you’re out.
There are now a small number webcams out there that can be used over a wireless wi-fi network, offering you video or still images over the Internet. Here are a few possible uses:
- Portable webcam – position the webcam where you want, so you could hold a video call from the garden, or offer a tour of the house
- Home security – Position a wireless webcam somewhere in your home, and set it to alert you remotely when motion is detected
- CatCam – Set the camera to keep an eye on your pets while you’re at work
- Outside surveillance – Point the camera through your window to get a view on your garden or the front of your house (a door entry system, or perhaps for your website)
- Computerless webcam – Use a wireless webcam without the need to keep your PC on (if you have a wireless router)
- Office CCTV – keep a track on the comings and goings in your office over the Internet
  PODCAST FEATURE: PODCAST FEATURE: wi-fi webcams: We looked at Internet cameras in Show 35 of FrequencyCast, our online radio show. Listen to our review | What is FrequencyCast? | Add us to iTunes |
Want to learn more about wireless webcams? Take a listen to Show 35 of our podcast, and all will be revealed!
Mini-review of the Linksys WVC54G
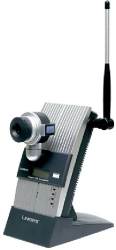 |
Linksys WVC54G (UK) Wireless-G Video Camera Integrated web server allows you to access the camera from anywhere in the world via the Internet.
Availability: This model, the Linksys WVC54G now appears to be discontinued (See the Amazon listing). However, an updated mode, the LinkSys WVC54GC is available. We’ve not reviewed it, but if you’re interested in getting a LinkSys wi-fi camera, try the following places: For alternatives, see the range of wireless IP cameras at www.networkwebcams.co.uk Know a supplier, or alternative? Contact us |
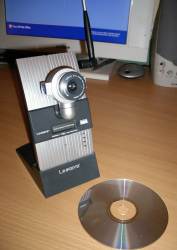 At the time of writing, this is the lowest-cost wi-fi camera available in the UK, and it works pretty well. It has a lot in common with the Sitecom camera reviewed above, but is still a slightly different beast. For one thing, it doesn’t support uploading of static images to a webpage (no built-in FTP), but it does a few things that the Sitecom doesn’t, such as transmission of audio from the built-in mic, automatic brightness and in-image timestamping. It also works with the Intamac service (free 30 day trial included) which uses motion-detection to alert you by text message, email or a recorded call to a phone number, when movement is detected.
One big disappointment for us came when we tried to view our live webfeed from the Firefox web browser – A message stating "MPEG-4 Video is only available with Microsoft Internet Explorer. For Netscape users, please use the Linksys Viewer and Recorder Utility". Sure enough,
you’re tied either to a dedicated viewer to access the video.
The WVC54G is a pretty odd-looking contraption, but as it can be used horizontally or vertically, the unusual styling works pretty well, and the twistable lens means that it’s a lot more flexible than the Sitecom. Image quality is good – the auto-brightness certainly helps in variable light conditions. Other features include the ability to provide users with password-protected access to video, and options to select from three sizes of video 160 x 268 , 320 x 240 or 640 x 480 (with 5 different quality settings)
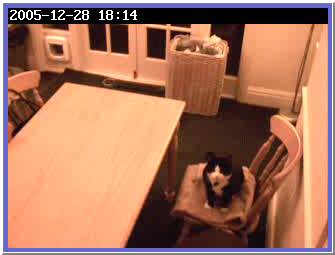
Indoor "cat" camera 320 x 240
As with the Sitecom, setup was pretty easy, provided you’re technically savvy about firewalls and IP addresses. You need to connect to a PC via an Ethernet cable to allow you to complete the initial setup, then you can use the provided software to enter your wi-fi settings (router address, WEP key, etc). You then need to open a port in your router to allow an external connection through your firewall. If you don’t have a static IP address for your Internet connection, you’ll need to use a service that can assign you a permanent address for your camera – the Linksys includes software for SoloLink DDNS service to help you make your camera accessible.
Below is a screenshot of the web-based camera setup:
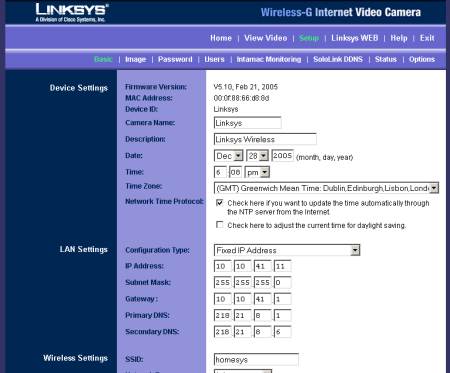
In summary, this is a capable camera – for us, the inability to upload static photos to our website, plus the fact that we had to use Microsoft Internet Explorer, was a disappointment – however, for flexibility, positionability, plus the motion-detection add-ons this is still a strong camera ideal for indoor use, especially for use for home security.
Linksys WVC54GUK FAQ:
| Latest firmware |
We’re running the following version: To download firmware, follow the support link from www-uk.linksys.com |
| System Requirements |
We’ve been asked for information on the system requirements for the and specifically whether it can be used on the Mac. Here are the official specs:
|
| Viewer / Recorder app |
If you need to download the Viewer and Recorder Utility application supplied on the Linksys CD, this can be downloaded from the Linksys Support site |
|
Got any questions we can help with about these two camera? |
Review of the Sitecom LN-401
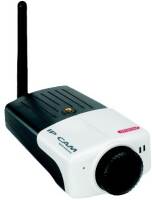 |
Sitecom LN-401 Accessible from any location via the internet. Easy to install and use. Can be configured over the web.
More details: Manufacturer’s site . Availability: As of Oct 2006, limited availability. Last seen at: For alternatives, see the range of wireless IP cameras at www.networkwebcams.co.uk Know a supplier, or alternative? Contact us |
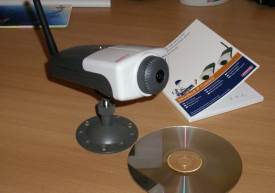 The Sitecom Ln401 is a wi-fi webcam that can be used to send images and video to the Internet without requiring connection to a PC. As long as you’re able to plug the camera into a power supply (with the DC adapter provided), the Ln401 can connect to an existing wi-fi network (stated line-of-site range of 100 metres), and do the following:
- Transmit video for viewing via a web-browser (using Java or an ActiveX control)
- Upload images to a web server via FTP (at timed intervals)
- Email images to a given email address (using SMTP)
The LN-401 works pretty well – we’re using ours as a weather camera, and it’s uploading to a website every 15 minutes – works perfectly for us and works well with our amateur weather station. Below is an image captured from our LN-401 camera – we’re using 320 x 240, but the camera supports up to 640 x 480 (as well as varying compression rates and frame rates). The interface also allows tweaking of brightness, contrast and saturation. Best of all, it’s possible to change the camera’s settings by remote, using an administration password. You can also define other users that are allowed password-protected access to your video feed or setup, as required.

Setup was fairly straightforward (for something that knows what they’re doing). To get going, it’s a case of making an ethernet connection to your router first off (to let you in to the device setup), then setting up the camera to be able to talk to your wi-fi router (WEP key, IP address, etc). You then need to open a port in your router to allow an external connection through your firewall. You won’t need to do this if you’re looking to use FTP upload, or image email, but you’ll need it if you want to access the streaming video or remote admin setup. If you don’t have a static IP address for your Internet connection, you’ll need to use a service such as dyndns.org, which can assign you a permanent address for your camera, that’s updated with your camera’s dynamically-assigned IP address. Below is a screenshot of the web-based camera setup:
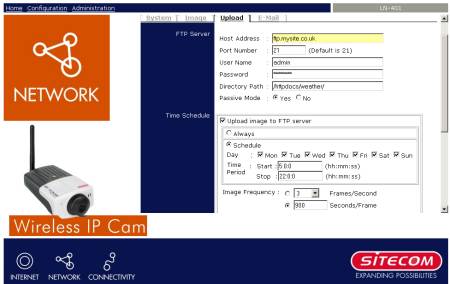
In summary, not a bad camera – Compared with the Linksys, we found the support for FTP uploading of images to be the killer for us – if you run a website and want images uploaded to your site – this is a good bet.
Sitecom LN-401 FAQ:
| Latest firmware |
We’re running the following version: |
| Updating the time |
The LN-401 supports updating the clock using the NTP protocol, You can get the camera to update automatically via Administration > Time. You’ll need to get the IP address of a NTP time server. A list of NTP servers can be found here.
|
|
Got any questions we can help with about these two camera? |
Other Wireless Webcam solutions
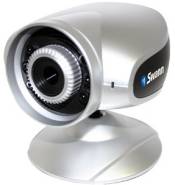 |
Max-IP-CAM / Swann IP Network CCTV Camera This wi-fi camera supports live viewing of video from anywhere in the world – it has a built-in CPU and web server. Movement can recorded and saved to SD card, hard drive or a VCR. Supports infrared for night-time viewing. Availability:
|
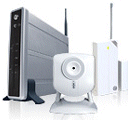 |
myhome247 Wireless Home Security System Here’s a great little product – a home security system that includes a motion-sensing wireless webcam, and a door-entry detection system – that can alert you by email and text if there’s movement in your home. An expandable, wireless security system, at a surprising price. Availability:
For full details, go to myhome247.co.uk, or see our full review on our Home Security page
|
For alternatives, see the range of wireless IP cameras at www.networkwebcams.co.uk
Problems connecting?
The easiest setup for a home network is to have a wi-fi enabled broadband router. If set up correctly, the router can see the net, and PCs, laptops and cameras can connect using a dedicated IP address to that router, which then routes requests off to the Internet. Troubleshooting networks, especially with non-standard setups can be a tricky business. We’re not experts in advanced network diagnostic work, but for what it’s worth, we’ve outlined a few things that might help track down any problems you’re having…
| Understanding the route |
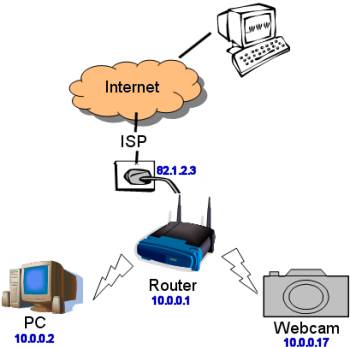
To get a connection from the Internet to your camera, take a moment to understand the route. Let’s assume you’re using Broadband – your internet connection will have its own IP address (Check your IP address). For this example, let’s assume your IP address for your home account with your provider is 82.1.2.3 , you have an existing wireless network (in the 10.0.0.x range), and your webcam has been assigned an IP address on that network of 10.0.0.17 (using port 1234):
The response makes it’s way back to the web browser and the webcam image is displayed. There are obviously a number of things that could go wrong, and it’s important to work through these:
|
| Dynamic IP address |
When you connect to the Internet, you’re assigned an IP address, which identifies you to the network. Your Internet IP address with be either Static or Dynamic. Unless you’re a business user or a home user paying a bit extra, chances are your IP address is Dynamic, meaning that when you connect and log on, you’re assigned a new address. To check your current IP address, check here.
Of course, if you have a static IP address, this isn’t an issue, as your IP address doesn’t change |
| Assigning a local address |
Typically, a home wireless network will have its own IP address range – often this is something like 192.168.x.x or 10.10.0.x – If connecting a webcam via a router, you’ll need to assign the camera to have an IP address and subnet mask that correspond with the settings of your router’s LAN settings. You can use a service called DHCP to get the route to provide your camera with an IP address, but if possible, it’s better to assign the camera a fixed IP address in the range supported by your LAN. Below is a shot of the Sitecom’s IP config section. in this example, our router’s LAN setting has an IP address of 10.10.0.1 with a subnet of 255.255.255.0 – Our camera is set a fixed IP address of 10.10.0.12 (in this case, not using DHCP, and making sure 12 is in the allowed IP range, and doesn’t clash with DHCP or any other device on the network)
Assuming you have a PC on the same LAN, use PING to check that the PC can see the camera over WiFi, as follows:
|
| wi-fi settings |
The wi-fi settings on your camera and router need to match. Things to check include:
Here’s the Sitecom’s WEP setting screen:
|
| Local port forwarding |
Once the request arrives at your router, the router has to route the request from the Internet through to the camera. Your local network (LAN) will have an IP range and the router needs to forward the request on to the IP address set up for your camera, and to the correct port. How this is done differs between routers. On a Belkin, here’s the screen, in this case showing that an external request for access to a camera on port 1234, is to route it to 10.10.0.17, port 1234:
|
| Other stuff to check |
|
|
Still having problems? Try asking in our Networking forum |
Links:
- Wi-Fi
Alliance
– Information on the Wi-Fi standard - Internet Cameras – Reviewed by our podcast team
- Home security – Our review of a leading home security system
- Our Forum
– For technical discussion of Wi-Fi protocols - wi-fi
on a Netgem – Help with getting broadband access from your TV,
wirelessly


